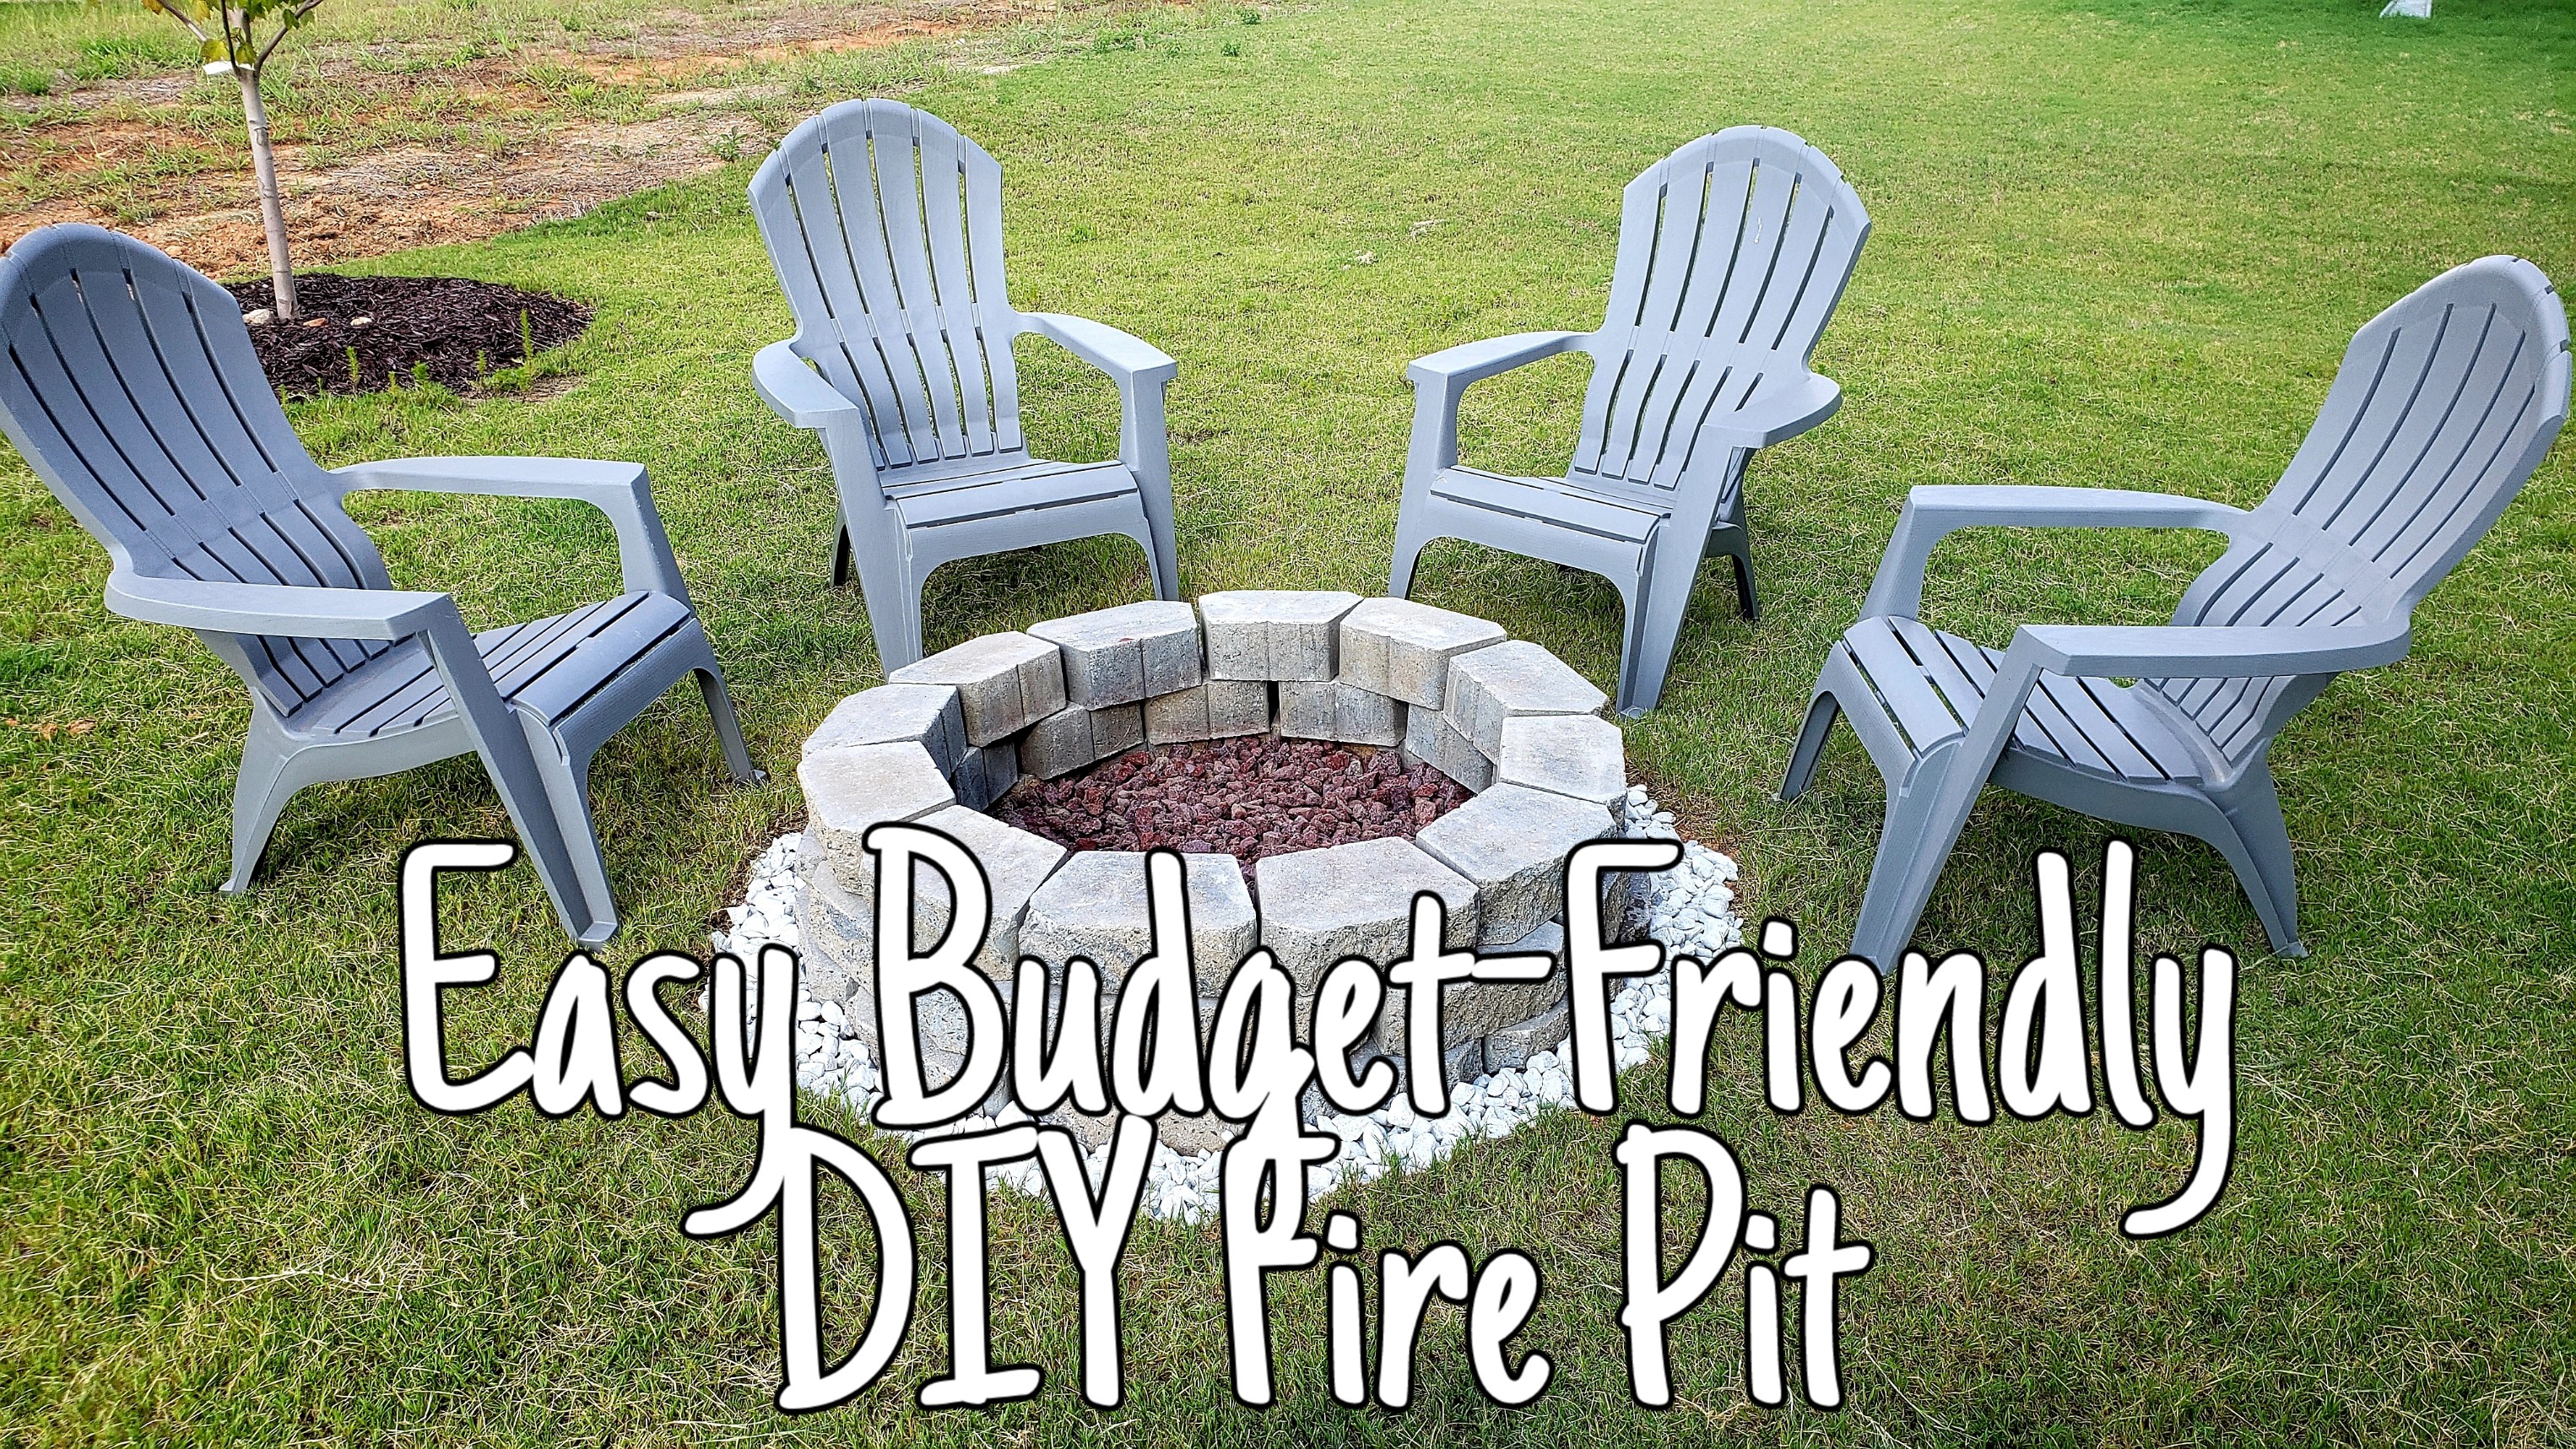
‘Tis the first day of Fall so I wanted to kick off my favorite season with a diy project that will surely come in handy for those chilly Fall nights. Moving from a second-floor apartment I dreamed of having a fire pit, so when we moved into our new home it was high on my must-have list. The only problem was that it wasn’t in the budget to pay someone to build it. So with our budget in mind, we decided to just build it ourselves. This was our first major diy project so we are in no way shape or form professionals, and we didn’t do everything perfect, but it turned out great nonetheless. We purchased all of the materials (minus the shovel and rake) from Home Depot and it only cost us around $60!
Materials needed:
Shovel
Landscape rake
2 bags of Red Lava Rocks
2 bags of Marble Chips
2 bags of Sand
36 Paver Stones
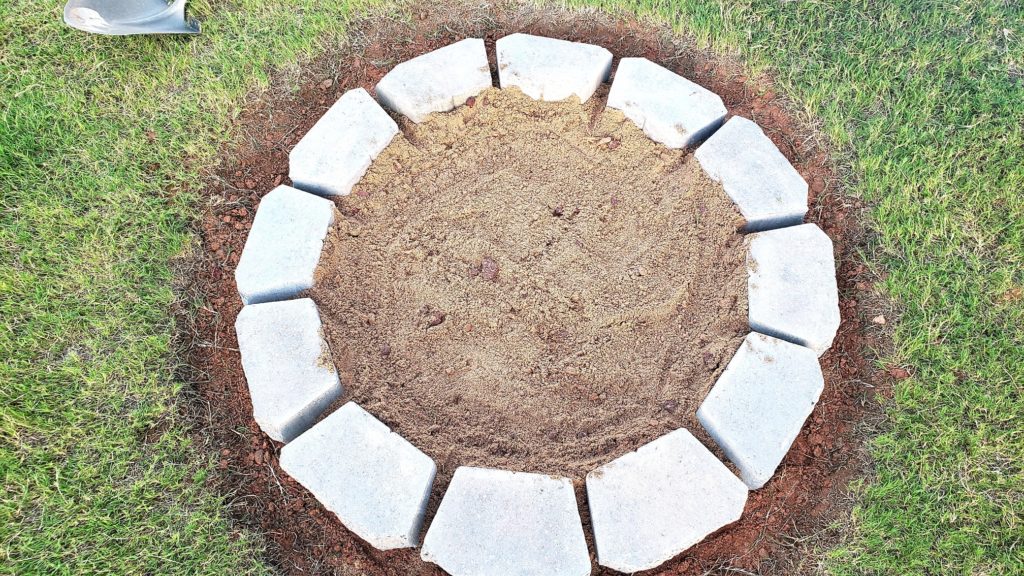
First, we laid out the first layer of paver stones to see how big we wanted the fire pit. We then measured about 5 inches out from the paver stones and made a circumference around the fire pit.
Next, we removed the paver stones and began digging a hole about 3 or 4 inches deep. Once the hole was dug we used a landscape rake to even out the dirt.
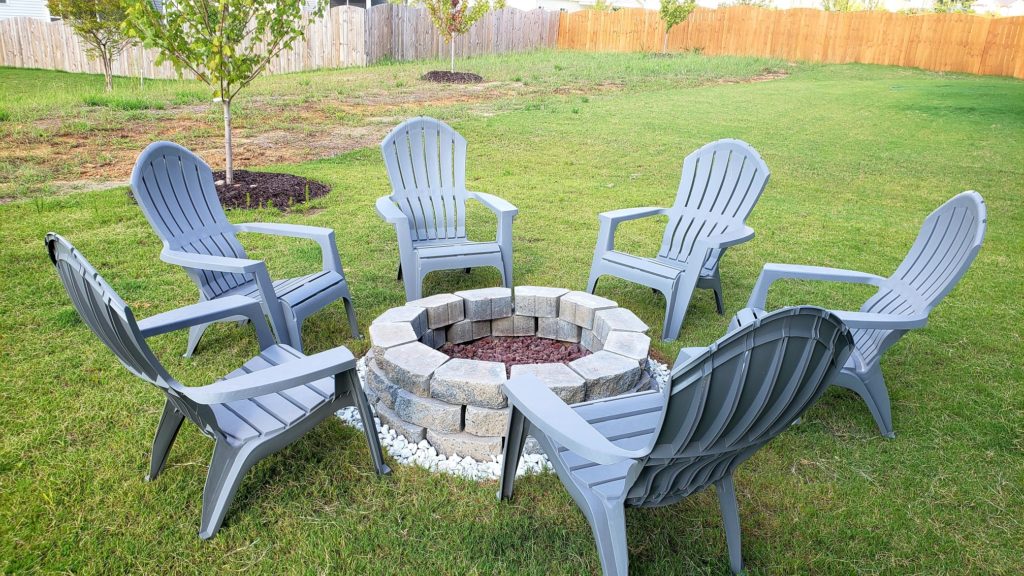
We then began laying the first layer of pavers (we used 12 pavers for each layer) while leaving a finger space between each paver for venting and leaving the 5-inch space surrounding the fire pit. We went ahead and poured the sand in the fire pit and evened it out with the landscape rake. We then poured the lava rocks in and evened them out. You can wait to pour the sand and lava rocks last if you choose, we just ended up doing it this way.
We laid the last two layers of pavers, moving each layer in about an inch. Then, we poured the marble chip rocks in the 5-inch space surrounding the fire pit….and voila!
We decided to add these cute gray adirondack chairs that I found online at target.com to complete the look. They were only $19 a piece. I also found them at Walmart (in-store only) for $13 a piece.
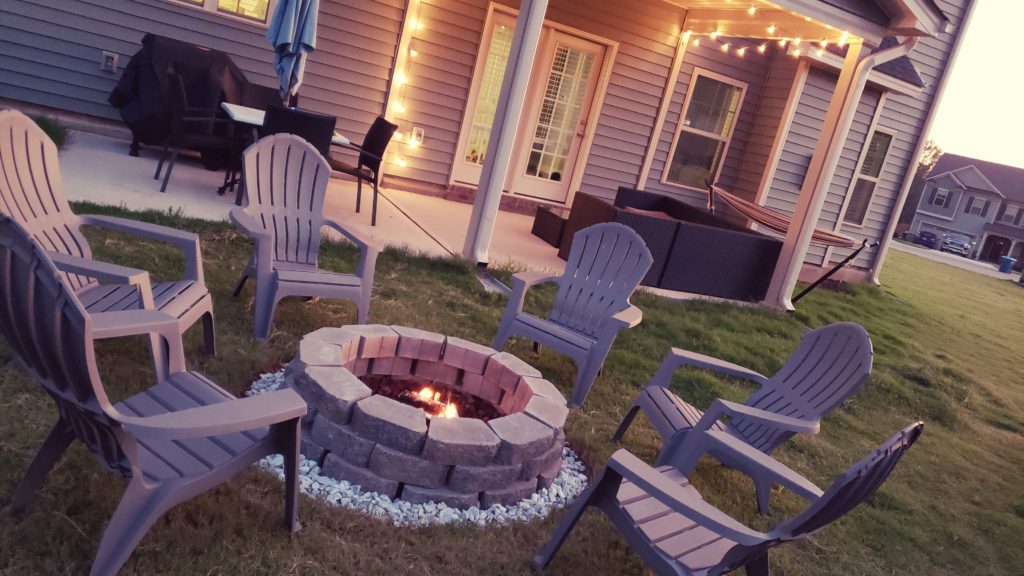
This diy project was super simple and cost us much less than if we would’ve paid someone to do it. We couldn’t be happier with the way that it turned out! Who’s ready for s’mores and roasted weenies? We are!
I absolutely love this! Thanks so much for sharing. I want to try it in our back yard! In the meantime would love to come over for roasted marshmallows one day soon! 😋I too love Fall! About how long would you say it took? You make it look so easy 🥰😁. Happy Fall Family!🍂 Great Post!
Thank you! I can’t remember exactly how long it took but the longest part would be digging the hole but after that it’s pretty much a breeze. It’s honestly been one of my favorite things about the backyard. But yes! We would love to have you guys over to roast some marshmallows before it gets too cold, because then I go into hibernation lol. 🙂


This project is well worth the hard work we put into. It’s going to create a lot of fun memorable moments we are going to share with our love ones.
Yes, it was. We have already created so many memorable moments within a short amount of time and I cant wait to create more ❤
I absolutely love this! Thanks so much for sharing. I want to try it in our back yard! In the meantime would love to come over for roasted marshmallows one day soon! 😋I too love Fall! About how long would you say it took? You make it look so easy 🥰😁. Happy Fall Family!🍂 Great Post!
Thank you! I can’t remember exactly how long it took but the longest part would be digging the hole but after that it’s pretty much a breeze. It’s honestly been one of my favorite things about the backyard. But yes! We would love to have you guys over to roast some marshmallows before it gets too cold, because then I go into hibernation lol. 🙂